Select options for each step to see pricing
Options for each step will appear when you complete the previous step and at the end of our guide, you’ll see the price for your custom designed pergola with free delivery!
Step 1 – Choose Your DIY Outdoor Pergola
A freestanding pergola is ideal for customers who want the option to create a living area or gathering space away from their home. A freestanding pergola could be used near a pool, hot tub, barbecue, outdoor seating, fire pit, or outdoor garden. Or they can be used to cover a deck or patio adjacent to your home.
An attached pergola is ideal for customers who want to create living space beside their home or structure. Attached pergolas are ideal for patios and decks.
Step 2 – Choose your Dimensions
All components of our pergola kits are trimmable. If you do not see the exact dimension you are looking for, select the next size up and it can be trimmed down if needed.
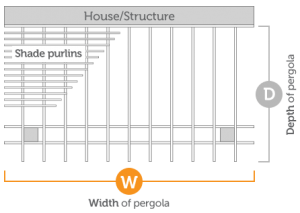
WIDTH – For attached pergolas, width is the dimension that attaches to your home or structure. Shade purlins run with the width of the pergola. See the diagram with this step.
DEPTH – For attached pergolas, depth refers to the dimension running perpendicular to your home or structure. See the diagram with this step.
For freestanding pergolas, the important fact to know is that the shade purlins run parallel with the width as shown in the diagram.
CAD drawings are available for the pergola you design. Click here for a sample of the CAD drawing you will receive. This sample drawing is a 14′ wide x 12′ deep freestanding pergola. Your CAD drawing will be the type(attached or freestanding) and dimensions(width and depth) you request. Contact us to get your CAD drawing.
Step 3 – Select a Color
All pergolas can come in either white or sandstone tan. You can also paint your pergola a color of your choice once it arrives.
Step 4 – Desired Shade Level
We offer three options for our shade.
- 50% shade(Wide) has the shade purlins 6″ on center.
- 75% shade(Standard) has purlin spacing at 4.25″ on center.
- 90% shade(Narrow) has purlin spacing at 3″ on center.
Step 5 – Choose your post size and style
All posts will come 10 feet long and can easily be trimmed down to the height that fits your installation. Watch our installation videos for more information.
Step 6 – Select Options and Accents
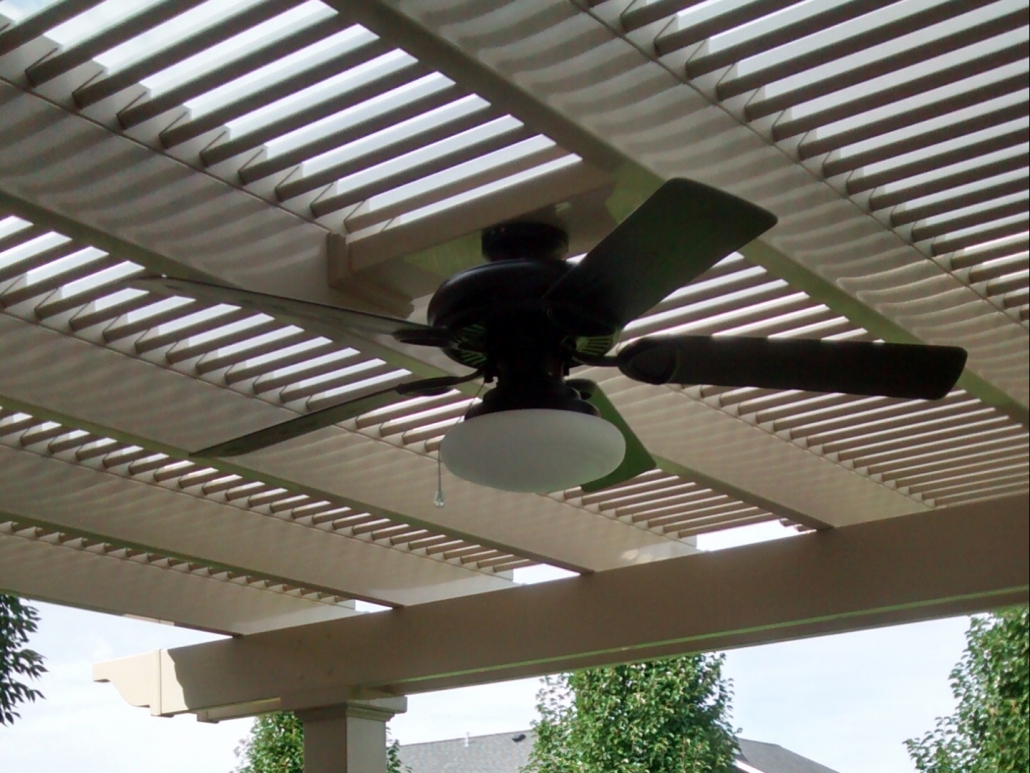
- Fan Mounts – Wiring can be installed easily in our aluminum inserts, unlike wood pergolas.
- Hurricane Clips – While not needed, some customers living in areas with threat of hurricane purchase hurricane clips to get full warranty in the event pergola is damaged by wind.
- End Caps – All end caps are priced the same. Please be sure to choose one.
OTHER IMPORTANT INFORMATION
- After you fully complete the six steps above, your pergola specifications and pricing are shown below. Contact our sales manager at [email protected] or call us at 800-352-1672 with any questions you have.
- To see how your pergola will ship, watch our pergola shipping video. Delivery time is about 2 weeks from time of order.
- Review our pergola installation videos and instructions here.
- CAD drawings are available for the pergola you designed. Email [email protected] or call 800-352-1672 to request your CAD drawing.
- We can customize the pergola you designed or design one from scratch. Contact us today.


